Sign up for Our Newsletter
Signup for our newsletter to get notified
about sales and new products.
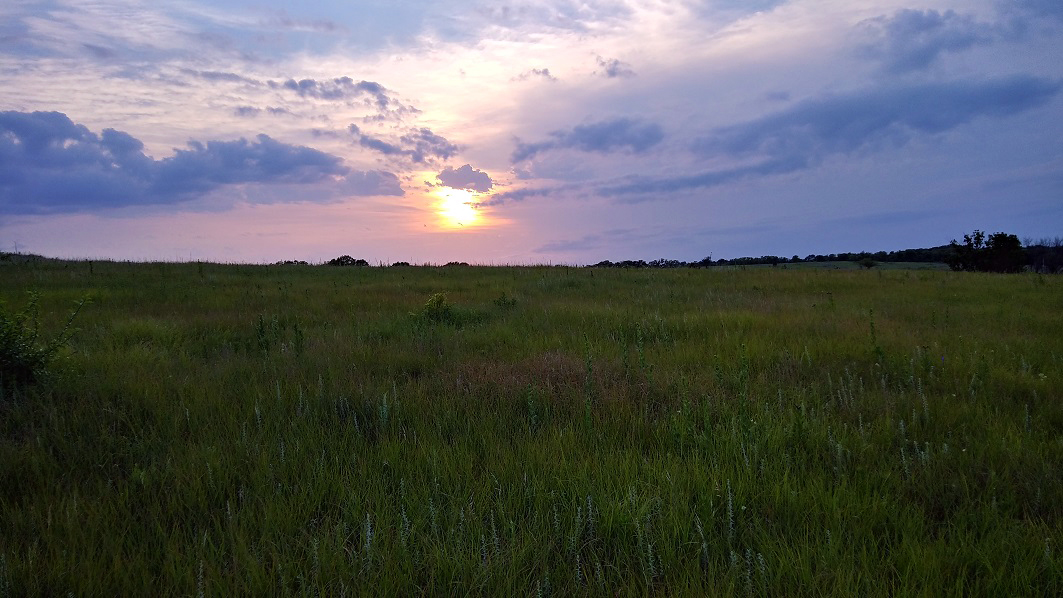
Wild or not, it is under your control. Your prairie planting can help you accomplish your goals. First determine what you want to achieve, then make a few decisions to get you there. Here are steps to help you along the way.
Planning comes first. The steps of your plan are as follows:
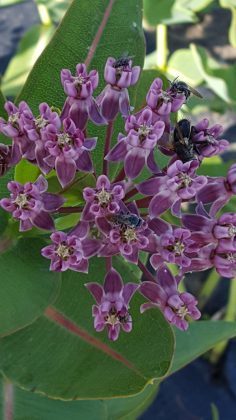
The size and scope of your desired planting will guide the rest of your plan. The steps are the same, but where you begin and where you want to end have a lot to do with the choices you make along the way. Any size native planting is helpful for our wildlife including pollinators. If you are living in the tallgrass prairie region, you are residing in one of the most endangered ecosystems on earth. The plants you surround yourself with makes a big difference to the wildlife that depends upon that habitat as well as to your own wellbeing. Take the time to study information from Xerces Society and other research to help you understand the effect pollinators have on the food and other resources that you depend upon. Common goals are:
Understanding the timing of native seed and prairie development will help you incorporate native prairie plants into your timing with rewarding results.
Patience is required. There is such a thing as an instant prairie (sort-of), but that requires using plants or pre-vegetated matting, not seed. It also often requires pre-ordering.
Plant at the right time to insure seed will break dormancy and seedlings survive. Seed of most perennial flowering plants will be dormant. That means nature has provided a thick coating or biological inhibitors that help it survive long enough for the right conditions to occur in nature. So in most cases, a cold moist period of a few weeks to a few months is required to break that dormancy. Most grasses and annual wildflowers have a shorter dormancy or no dormancy at all. You can plan when you plant to help break seed dormancy.
If you plant in the late fall or winter, nature will provide the cold moist period needed as long as the seed has proper contact with the soil. Planting in the spring will mean that many wildflowers will lie dormant in the soil until the following spring. The exception of course is for annual wildflowers and many grasses. Planting in the summer time is risky because those that are not dormant may begin to sprout and then dry out in the heat of the summer and those that do make it will not have adequate time to establish a good root system to get it through the winter. The best time to successfully plant your prairie depends on your goals, but often occurs in the late fall or winter.
Understand your prairie timeline. Our Prairie Pronto seed mix includes many annual and biennial species that help you get results quickly, but ultimately, the best results will come in a couple of years time. While some seed mixes incorporate many annual plant species, most are perennial. Unless you are putting in plants instead of seed, expect your planting to take at least a year to see results. Patience is important in prairie plantings, particularly if your goals include planting an area covering more than a few hundred square feet.
How much time do you have and how much time are you willing to spend? The more time you spend in planning and preparation the better your success is likely to be. If you have a year or more, you can use valuable time removing old vegetation and depleting the weed seed bank. If not, never fear, you can still march ahead. For larger areas, it may take just a little longer to achieve the desired effect.
Most native mixes are largely composed of perennial plants. Assuming you start from seed, these plants require the first year to break dormancy, germinate and establish roots. Some species will flower the second year, but it will take 3 to 5 years for most plantings to become established.
Determine plant species and seeding rate. Seed can be purchased in packets of individual species, as pre-made mixes, or in custom mixes. We recommend a seeding rate of no fewer than 40 seeds per square foot. If you are broadcasting seed, most programs recommend twice that or 80 seeds per square foot. In order to get cover very quickly, 120 seeds per square foot can be helpful.
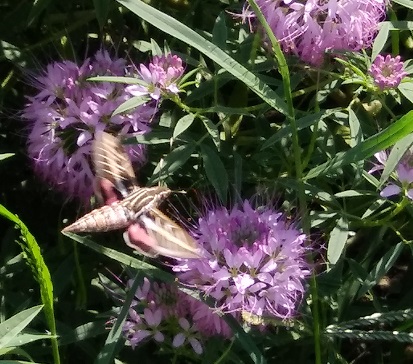 Consider the seed source. If your goal is to restore native prairie or provide habitat for pollinators, the most suitable seed will be purchased or collected from within 100 to 200 miles of your project. The life stages of local pollinators often require specific plants to bloom within specific weeks. Local genetics insure that bloom times coincide with local pollinator needs. In Nebraska and northern Kansas, that is often hard, but not impossible to find. Much of our seed is spoken for in late fall, but we always reserve some seed for spring projects. Be sure to reserve your seed early, particularly if you have a large project. Our seed is all collected from wild sources initially then grown out in our fields. Wild collected seed is called zero (0) generation seed. After it is grown in the seed plots, it is first (1) generation seed. If it is grown again from first generation, the resulting seed is second generation. After that, we start again with wild collected seed sources, so be assured that our seed is still well adapted to this area. Be sure to ask your seed dealer where their seed originates so you can make informed decisions about your prairie planting.
Site preparation consists of removing old vegetation and as much weed seed as possible. In addition, you may need to incorporate organic matter or topsoil, particularly if you are in an urban area or in a compacted area where construction has occurred. Selection of a specific approach to site preparation depends upon the existing site conditions and the size of your project.
Prepare small areas. If you have a small area to work with, you have several options for site preparation. In a lawn, simply remove the sod manually and add a little top soil. If you prefer, you can kill the sod by layering items such as cardboard, old carpeting, and boards over the the top, making sure to overlap pieces so that the grass doesn’t grow through cracks. You can also kill the sod with chemicals, or by using solarization. If you have a weedy area and don’t want to use chemicals, solarization is often the method of choice.
Solarization requires mowing, watering, then placing thin (3-4 mil) clear plastic over the site. This plastic is available at most hardware stores in large sheets. Seal the edges with soil, boards, or fabric staples. Cut a few small slits in low spots to allow water to drain off. The sun will do the rest. Keep the plastic on for 6 to 16 weeks; tough weeds such as bindweed require three months for a complete kill. Weeds and weed seed will continue to sprout under the plastic and burn up. Each time the bindweed or other weed begins to grow, it expends a little more of its stored energy until if finally gives up.
Prepare to convert a smooth brome field into prairie. In a field dominated by smooth brome grass, the best approach is to remove the brome or set it back as much as possible. The most effective method is to spray the brome with herbicide in late fall and again when it begins to warm up in the spring. Then continue to spray every 6 weeks until late October. Seed can be planted in mid- to late December. Another method is to treat the area with herbicide once in the fall and once in the spring, then plant seed in the spring.
If you are using a seed drill to plant, it is not necessary to plow, disc or rototill the soil. However, if you plan to broadcast seed by hand or with machinery, discing or tilling the soil is required so that the seed will have direct contact with the soil.
Prepare to convert cropland to prairie or CRP. If you are converting cropland and plan to be in the CRP program, your local NRCS agent will have a plan for you to follow. If you are on your own, the first item of business is to determine what chemicals have been applied to the cropland in the past 2 years. Pre-emergent herbicides such as atrazine and many other chemicals have a residual effect that may prevent seed from germinating. If that is the case, plan to plant soybeans for another year or plant a cover crop that will prevent weeds from taking over while the herbicide wears off. Seed can be drilled into soybean fields if the stubble is chopped very fine and there are no windrows or piles from combining. If stubble has been piled then bale it or disc it in. If you plan to broadcast seed by hand or with machinery, you will need to disc or till the field.
Prepare to overseed an existing prairie. If smooth brome occurs within your prairie, you may want to apply a chemical treatment in the late fall after the native species have become dormant. If you are broadcasting seed, you have the option of lightly discing first. This will bring up weed seed, but it will also allow your native seed to land on bare ground. As an alternative, you might rake the prairie first to create bare patches of soil. If the plan is to drill seed, it is not necessary to rake or disc.
Native seed should be planted no more than ¼ inch deep. Broadcasting on top of the ground is also acceptable. Scoring the ground and pressing the seed in is helpful to promote seed to soil contact when broadcasting is used. Note that many small seeds require light for germination, so be careful not to plant these seeds too deeply.
Hand broadcast areas less than an acre. Areas of a few square feet or up to an acre can easily be hand broadcast. Mixing the seed with rice hulls, vermiculite, cracked corn, or sand is an easy way to make sure it gets spread evenly. With small areas we prefer vermiculite because it is easy to see where you have spread the seed. Rice hulls are the cheapest option at about $0.35 per pound. There is no rule about how much carrier to add. We use approximately one gallon of carrier per 100 square feet. Mix it in with your seed well then divide your mixture in half. For small areas, spread this half of the seed over the entire area to be seeded, then use the second half and repeat. Doing it this way ensures that you will not run out of seed before the job is done. For somewhat larger areas you can divide the area into quarters then divide ½ of your seed into four parts and spread the seed into each quarter, then repeat with the second half of the seed. Tossing the seed in a light breeze helps distribute the seed. Don’t attempt to hand broadcast on very windy days. When you are finished broadcasting, use a sod roller, tires or foot traffic to press the seed into the soil. Cover with a very light mulch and water. Keep the soil moist until the tiny plants establish roots.
Plant an acre or more. In areas larger than one acre, seed can be broadcast by hand, with a hand crank grass seeder, a broadcast spreader, or a Brillion seeder. When broadcasting, dragging a chain across the seeded area or pressing the seed down is necessary to keep seed in contact with moist soil. A seed drill is the most efficient way to get good seed to soil contact. That said, if you are using a drill, one can set aside the seed of species that require light to germinate and broadcast these after the other seed is planted.
Decide whether or not to mow. Once your seed is in the ground, seed that germinates in the first growing season will spend most of its energy establishing roots. A few of the annual species may bloom, and biennials will grow low rosettes. Mowing is recommended to keep weed seed from reproducing. Each time weeds reach bloom height, mow the planting to a height of 6 inches. You may need to mow every 6 to 8 weeks. In the second season, mowing is recommended twice. In the third season, the native species should begin to bloom and provide coverage that discourages weeds.
In the case of seed mixes designed for rapid establishment (i.e., those that include many annual species), mowing is still helpful but is not required. Any seed mix can be established without mowing, but the site may look weedy for the first couple of years.